VueMastery


Appearance
canvas画布的默认大小是 宽 x 高 = 300 x 150// 获取画布元素
const canvas = document.getElementById("canvas") as HTMLCanvasElement;
// 获取上下文对象: context
const ctx = canvas.getContext("2d") as CanvasRenderingContext2D;// 获取窗口宽高
const WIDTH = document.documentElement.clientWidth;
const HEIGHT = document.documentElement.clientHeight;
// 设置canvas宽高为窗口宽高
canvas.width = WIDTH;
canvas.height = HEIGHT;说明:
函数签名:ctx.moveTo(x, y)
x、y:将画笔移动到(x, y)坐标
功能:将画笔移动到(x,y)坐标
函数签名:ctx.lineTo(x, y)
x、y:绘制直线到(x, y)坐标
功能:根据画笔原来的坐标点绘制一条直线到(x,y)坐标。
function strokeLine() {
  ctx.moveTo(0, 0); // 移动到(x,y)坐标
  ctx.lineTo(150, 150); // 绘制直线到终点(x,y)
  ctx.stroke();
}
strokeLine()说明:
ctx.fillRect(x, y, width, height)x、y:矩形左上顶点的横纵坐标width、height:矩形宽高(x,y)、宽高为(width, height)的填充矩形,填充颜色由前面的fillStyle属性提前指定好。function strokeRect() {
ctx.fillStyle = "#f00"; // 设置填充颜色
ctx.fillRect(0, 0, WIDTH, HEIGHT); // 调用内置绘制一个填充矩形的方法
}
strokeRect();说明:
ctx.arc(x, y, radius, startAngle, endAngle [, anticlockwise]);x、y:分别为圆心的横纵坐标radius:圆形半径startAngle:圆弧开始的角度endAngle:圆弧结束的角度anticlockwise:弧度的开始到结束的绘制是按照顺时针来算,还是按时逆时针来算。如果设置为true表示按照逆时针绘制。(x,y),半径为radius,从开始角度startAngle到结束角度endAngle(可选项是逆时针还是顺时针,默认是false表示顺时针绘制)的圆形。角度是固定的:正右方:0 或 2 * Math.PI、正下方:Math.PI / 2、正左方:Math.PI、正上方:Math.PI * 1.5,也就是正右方为起点。根据这个规律,应该知道圆形上的定位规律了把。function strokeCircle() {
ctx.beginPath(); // 开始绘制一条新路径
ctx.arc(100, 100, 50, Math.PI / 2, Math.PI); // 从正下方到正左方的一个弧线
ctx.stroke();
}
strokeCircle();说明:
ctx.strokeText(string, x, y)string:要描绘的文本x、y:文本开头第一个字符左上角的坐标空心文本。实心文本:ctx.fillText(string, x, y)function strokeText() {
ctx.font = "30px Arial";
ctx.strokeText("Hello World!", 50, 50);
}
strokeText();说明:
渐变可以填充在矩形, 圆形, 线条, 文本等等, 各种形状可以自己定义不同的颜色。
函数签名:createLinearGradient(x,y,x1,y1)
x、y:起点坐标x1、y1:终点坐标(x,y)坐标到(x1,y1)坐标的线性渐变。函数签名:createRadialGradient(x,y,r,x1,y1,r1)
x、y:渐变的起始圆的中心点横纵坐标
r:起始圆的半径
x1、y1:渐变的结束圆的中心点横纵坐标
r1:结束圆的半径
功能:创建一个从(x,y)坐标到(x1,y1)坐标的径向渐变。
注意:
当我们使用渐变对象,必须使用两种或两种以上的停止颜色。
addColorStop()方法指定颜色停止,参数使用坐标来描述,可以是0至1之间的数值.
使用渐变,设置fillStyle或strokeStyle的值为 渐变,然后绘制形状,如矩形,文本,或一条线。
function strokeGradient() {
  // 创建渐变
  const gradient = ctx.createLinearGradient(0, 0, 200, 200);
  gradient.addColorStop(0, "red");
  gradient.addColorStop(1, "blue");
  // 填充渐变
  ctx.fillStyle = gradient;
  ctx.fillRect(0, 0, 200, 200);
}
strokeGradient();function strokeRadialGradient() {
// 创建渐变
const gradient = ctx.createRadialGradient(100, 100, 20, 100, 100, 50);
gradient.addColorStop(0, "red");
gradient.addColorStop(1, "blue");
// 填充渐变
ctx.fillStyle = gradient;
ctx.fillRect(0, 0, 200, 200);
}
strokeRadialGradient();说明:
ctx.drawImage(image, dx, dy)ctx.drawImage(image, dx, dy, dWidth, dHeight)ctx.drawImage(image, sx, sy, sWidth, sHeight, dx, dy, dWidth, dHeight)image:绘制在Canvas上的元素,可以是各类Canvas图片资源(见CanvasImageSource),如<img>图片,SVG图像,Canvas元素本身等。dx:在Canvas画布上规划一片区域用来放置图片,dx就是这片区域的左上角横坐标。dy:在Canvas画布上规划一片区域用来放置图片,dy就是这片区域的左上角纵坐标。dWidth:在Canvas画布上规划一片区域用来放置图片,dWidth就是这片区域的宽度。dHeight:在Canvas画布上规划一片区域用来放置图片,dHeight就是这片区域的高度。sx:表示图片元素绘制在Canvas画布上起始横坐标。sy:表示图片元素绘制在Canvas画布上起始纵坐标。sWidth:表示图片元素从坐标点开始算,多大的宽度内容绘制Canvas画布上。sHeight:表示图片元素从坐标点开始算,多大的高度内容绘制Canvas画布上。function drawImage() {
const img = document.createElement("img") as HTMLImageElement;
img.src =
"https://img1.baidu.com/it/u=4214113141,2036563917&fm=253&fmt=auto&app=120&f=JPEG?w=500&h=889";
ctx.drawImage(img, 0, 0, 400, 600);
}
drawImage();function drawImage() {
const img = document.createElement("img") as HTMLImageElement;
img.src = "https://img1.baidu.com/it/u=4214113141,2036563917&fm=253&fmt=auto&app=120&f=JPEG?w=500&h=889";
img.onload = () => {
ctx.drawImage(img, 150, 100, 200, 300, 0, 0, 200, 300);
};
}
drawImage();function strokeGrid() {
ctx.strokeStyle = "rgba(0,0,0,0.3)";
ctx.save();
// 绘制垂直线
for (let i = 0; i < WIDTH; i += 50) {
ctx.beginPath();
ctx.moveTo(i, 0);
ctx.lineTo(i, HEIGHT);
ctx.closePath();
ctx.stroke();
}
// 绘制水平线
for (let i = 0; i < HEIGHT; i += 50) {
ctx.beginPath();
ctx.moveTo(0, i);
ctx.lineTo(WIDTH, i);
ctx.closePath();
ctx.stroke();
}
ctx.restore();
}
strokeGrid()
function fillCircle(x: number, y: number) {
  // 绘制红色圆圈
  ctx.beginPath();
  ctx.arc(x, y, 10, 0, Math.PI * 2);
  ctx.closePath();
  ctx.fill();
}

function fillTriangle() {
  ctx.fillStyle = "blue";
  ctx.beginPath();
  ctx.moveTo(150, 100);
  ctx.lineTo(50, 200);
  ctx.lineTo(250, 200);
  ctx.lineTo(150, 100);
  ctx.closePath();
  ctx.fill();
  // -------------绘制三个圆圈
  ctx.fillStyle = "red";
  fillCircle(150, 100);
  fillCircle(50, 200);
  fillCircle(250, 200);
}
fillTriangle();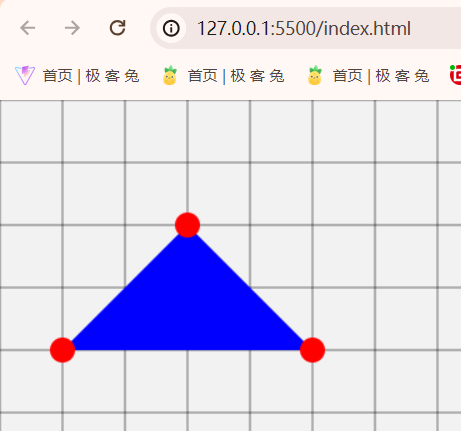
| 函数名称 | 功能描述 |
|---|---|
strokeRect(x, y, width, height) | 绘制一个矩形的边框 |
fillRect(x, y, width, height) | 绘制一个填充的矩形 |
clearRect(x, y, width, height) | 清除指定的矩形区域,然后这块区域会变的完全透明。 |
moveTo(x, y) | 把画笔移动到指定的坐标(x, y)。相当于设置路径的起始点坐标。 |
beginPath() | 新建一条路径,路径一旦创建成功,图形绘制命令被指向到路径上生成路径 |
closePath() | **闭合路径。**闭合路径之后,图形绘制命令又重新指向到上下文中。在填充颜色时,需要根据路径的闭合方式进行填充 |
stroke() | 通过线条来绘制图形轮廓。根据路径绘制描边,前提要设置好描边样式的值(strokeStyle) |
fill() | 通过闭合区域生成实心的图形 |
arc(x, y, radius, startAngle, endAngle) | 绘制弧形(也是绘制圆的方法) |
fillText() | 绘制实心文本 |
strokeText() | 绘制文字轮廓 |
fillStyle | 设置图形的填充颜色 |
strokeStyle | 设置图形轮廓的颜色 |
globalAlpha | 这个属性影响到 canvas 里所有图形的透明度,有效的值范围是 0.0 (完全透明)到 1.0(完全不透明),默认是 1.0。globalAlpha 属性在需要绘制大量拥有相同透明度的图形时候相当高效。不过,我认为使用rgba()设置透明度更加好一些。 |
lineWidth | 线宽。只能是正值。默认是 1.0。 |
lineCap | 线条末端样式。可选值butt(线段末端以方形结束)、round(线段末端以圆形结束)、square(线段末端以方形结束,但是增加了一个宽度和线段相同,高度是线段厚度一半的矩形区域。) |
lineJoin | round 通过填充一个额外的,圆心在相连部分末端的扇形,绘制拐角的形状。 圆角的半径是线段的宽度。bevel在相连部分的末端填充一个额外的以三角形为底的区域, 每个部分都有各自独立的矩形拐角。miter(默认)通过延伸相连部分的外边缘,使其相交于一点,形成一个额外的菱形区域。 |
说明:
Canvas绘图是基于状态的绘图,状态是可以使用ctx.save()和ctx.restore()进行入栈和出栈操作的,也就是保存当前状态和恢复上一个状态。Canvas 的状态就是当前画面应用的所有样式和变形的一个快照。关于 save()
save()方法被调用后,当前的状态就被推送到栈中保存。一个绘画状态包括:strokeStyle, fillStyle, globalAlpha, lineWidth, lineCap, lineJoin, miterLimit, shadowOffsetX, shadowOffsetY, shadowBlur, shadowColor, globalCompositeOperation 的值clipping path)可以调用任意多次 save 方法。(类似数组的push())
关于restore()
restore 方法,上一个保存的状态就从栈中弹出,所有设定都恢复。(类似数组的pop())// 保存之前的状态
ctx.save();
// 设置当前新的状态
ctx.fillStyle = "red";
// 绘制填充矩形
ctx.fillRect(50, 50, 50, 50);
// 将当前状态弹出,恢复到上一个状态
ctx.restore();
// 绘制填充矩形
ctx.fillRect(0, 0, 50, 50);说明:
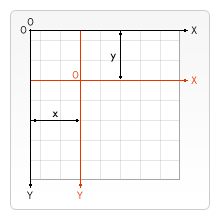
ctx.translate(x, y)x、y:表示新的坐标系原点的坐标。canvas 的原点到指定的位置,即将坐标系由默认的位置移动到指定的位置,形成新的坐标系。translate方法接受两个参数。x 是左右偏移量,y 是上下偏移量,如右图所示。在做变形之前先保存状态是一个良好的习惯。大多数情况下,调用 restore 方法比手动恢复原先的状态要简单得多。又如果你是在一个循环中做位移但没有保存和恢复canvas 的状态,很可能到最后会发现怎么有些东西不见了,那是因为它很可能已经超出 canvas 范围以外了。
注意:translate移动的是canvas的坐标原点。(坐标变换)
function translate() {
  // 保存之前的状态
  ctx.save();
  ctx.fillStyle = "red";
  ctx.translate(100, 100);
  ctx.fillRect(0, 0, 100, 100);
  ctx.restore();
}
translate();说明:
ctx.rotate(angle)angle:旋转角度,默认顺时针,弧度制。负数表示逆时针。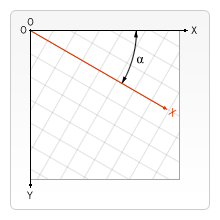
function rotate() {
  ctx.save();
  ctx.beginPath();
  // 经过下面两个方法的调整后坐标轴是x轴正向朝上,y轴正向朝右,坐标原点在左下角
  ctx.translate(0, HEIGHT);
  ctx.rotate(-Math.PI / 2);
  // 绘制一个x轴离原点100px,y轴离原点50px,半径为50px的填充圆
  ctx.arc(100, 50, 50, 0, Math.PI * 2);
  ctx.closePath();
  ctx.fill();
  ctx.restore();
}
rotate();说明:
ctx.scale(x, y)x、y:表示x和y轴方向的缩放比例scale方法接受两个参数。x,y分别是横轴和纵轴的缩放因子,它们都必须是正值。值比 1.0 小表示缩 小,比 1.0 大则表示放大,值为 1.0 时什么效果都没有。canvas 的 1 单位就是 1 个像素。举例说,如果我们设置缩放因子是 0.5,1 个单位就变成对应 0.5 个像素,这样绘制出来的形状就会是原先的一半,并且图形距离原点的x轴和y轴坐标像素也会缩放成对应的比例大小。同理,设置为 2.0 时,1 个单位就对应变成了 2 像素,绘制的结果就是图形放大了 2 倍,图像距离原点也会成比例缩放。ctx.scale(2, 2); // 放大两倍
ctx.fillStyle = "red";
ctx.fillRect(50, 50, 100, 100); // 此时图形相当于正常情况下的两倍大小,不管是离原点的距离还是图形大小说明:
ctx.transform(a, b, c, d, e, f)a: 水平缩放倍数:<1 表示缩小,>1表示放大,默认1无任何变化b: 水平倾斜程度:0~1,相对于自身的水平大小成比例倾斜c: 垂直倾斜程度:0~1,相对于自身的垂直大小成比例倾斜d: 垂直缩放倍数:<1 表示缩小,>1表示放大,默认1无任何变化e: 水平移动距离:距离原点的移动距离f: 垂直移动距离:距离原点的移动距离ctx.fillStyle = "red";
ctx.transform(1, 0, 0, 1, 50, 50);
ctx.fillRect(0, 0, 100, 100);
/**
* a b c
* c d f
* 0 0 1
*
* a: 水平缩放倍数:<1 表示缩小,>1表示放大
* b: 水平倾斜程度:0-1
* c: 垂直倾斜程度:0-1
* d: 垂直缩放倍数:<1 表示缩小,>1表示放大
* e: 水平移动距离:距离原点的移动距离
* f: 垂直移动距离:距离原点的移动距离
*
*/说明
arcTo 方法的说明:
这个方法可以这样理解。绘制的弧形是由两条切线所决定。
第 1 条切线:起始点和控制点1决定的直线。
第 2 条切线:控制点1 和控制点2决定的直线。

function arcTo() {
  ctx.strokeStyle = "red";
  ctx.font = "18px Arial";
  ctx.fillStyle = "orangered";
  ctx.beginPath();
  ctx.moveTo(150, 50);
  ctx.lineTo(300, 50);
  ctx.closePath();
  ctx.stroke();
  ctx.beginPath();
  ctx.moveTo(300, 50);
  ctx.lineTo(300, 200);
  ctx.closePath();
  ctx.stroke();
  /**曲线由两个控制点的位置决定 */
  ctx.beginPath();
  ctx.moveTo(150, 50);
  ctx.fillText("起始点", 160, 42);
  ctx.arcTo(300, 50, 300, 200, 150);
  ctx.lineTo(300, 200);
  ctx.stroke();

  /**描述控制点 */
  ctx.beginPath();
  // 控制点1
  ctx.rect(295, 45, 10, 10);
  ctx.fillText("控制点1", 310, 42);
  // 控制点2
  ctx.rect(295, 195, 10, 10);
  ctx.fillText("控制点2", 310, 192);
  ctx.stroke();
}
arcTo();ctx.moveTo(50, 50);
ctx.quadraticCurveTo(150, 150, 150, 300);
ctx.stroke();ctx.moveTo(50, 50);
ctx.bezierCurveTo(250, 100, 250, 200, 350, 500);
ctx.stroke();说明:
对合成的图形来说,绘制顺序会有限制。不过,我们可以利用
globalCompositeOperation属性来改变这种状况。
属性:ctx.globalCompositeOperation = type,type 是下面 13 种字符串值之一:
source-over(default):这是默认设置,新图像会覆盖在原有图像。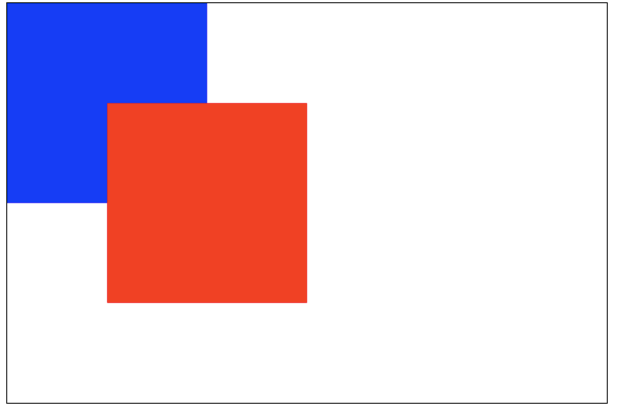
source-in:仅仅会出现新图像与原来图像重叠的部分,其他区域都变成透明的。(包括其他的老图像区域也会透明)
source-out:仅仅显示新图像与老图像没有重叠的部分,其余部分全部透明。(老图像也不显示)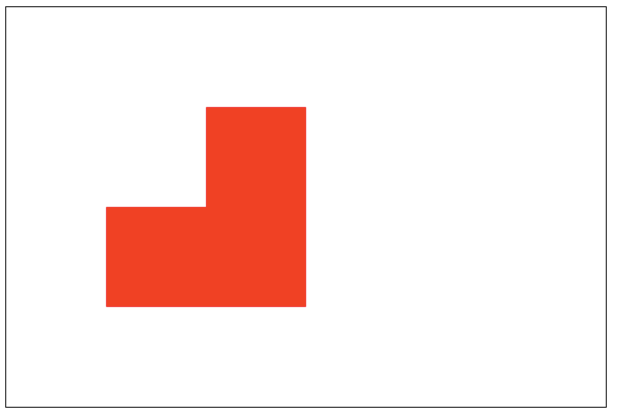
source-atop:新图像仅仅显示与老图像重叠区域。老图像仍然可以显示。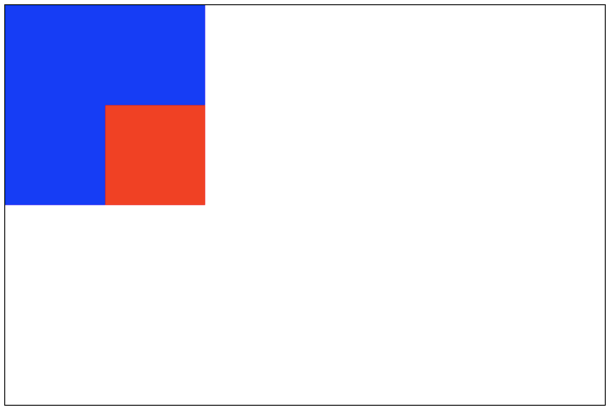
destination-over:新图像会在老图像的下面。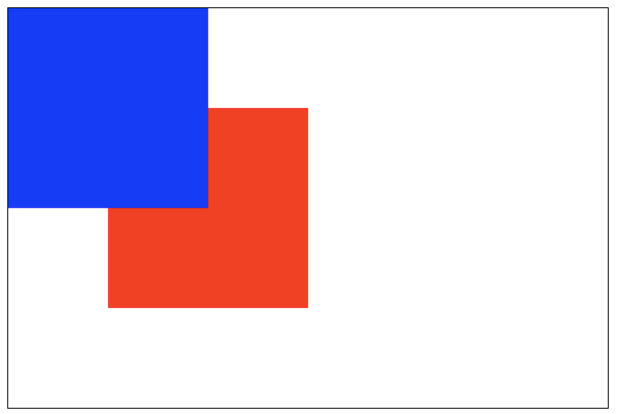
destination-in:仅仅新老图像重叠部分的老图像被显示,其他区域全部透明。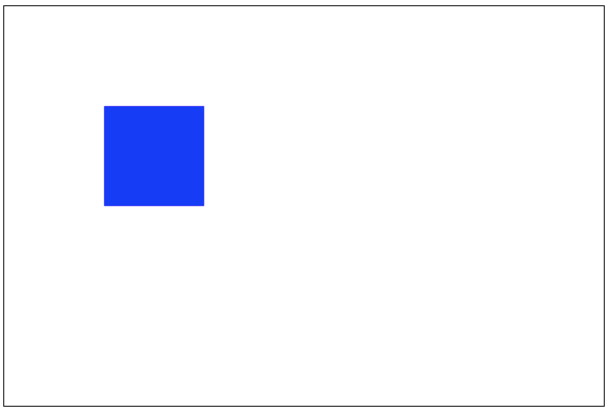
destination-out:仅仅老图像与新图像没有重叠的部分。 注意显示的是老图像的部分区域。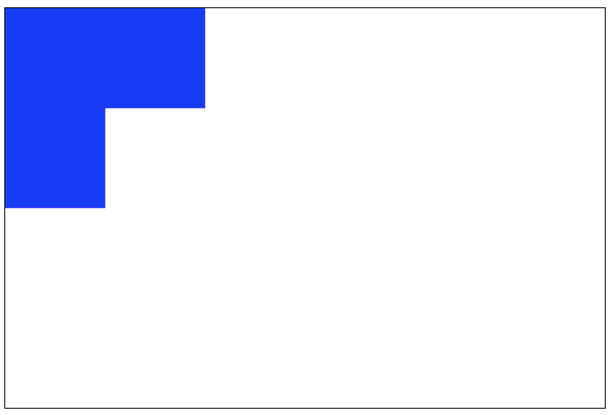
destination-atop:老图像仅仅仅仅显示重叠部分,新图像会显示在老图像的下面。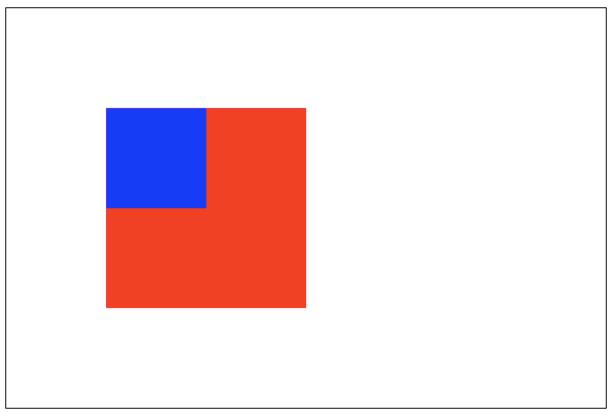
lighter:新老图像都显示,但是重叠区域的颜色做加处理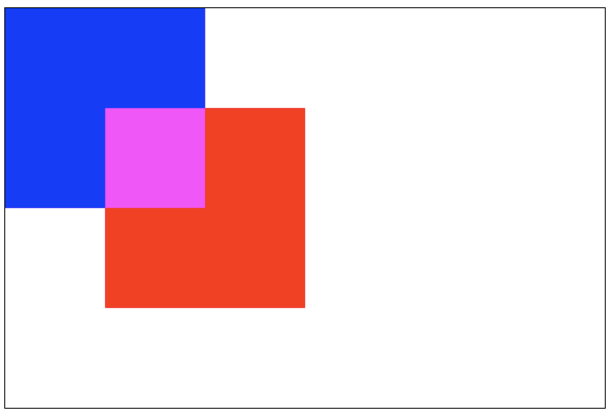
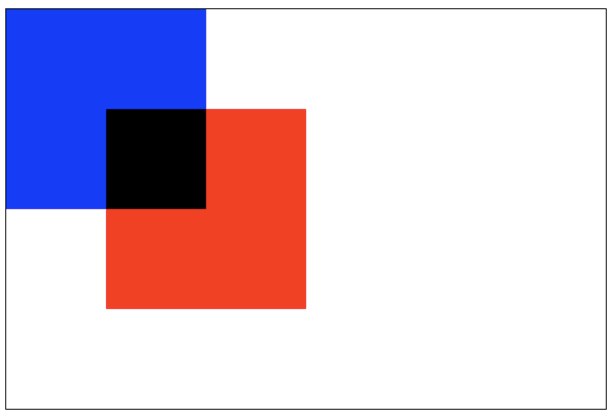
darken:保留重叠部分最黑的像素。(每个颜色位进行比较,得到最小的)blue: #0000ff
red: #ff0000
所以重叠部分的颜色:
#000000
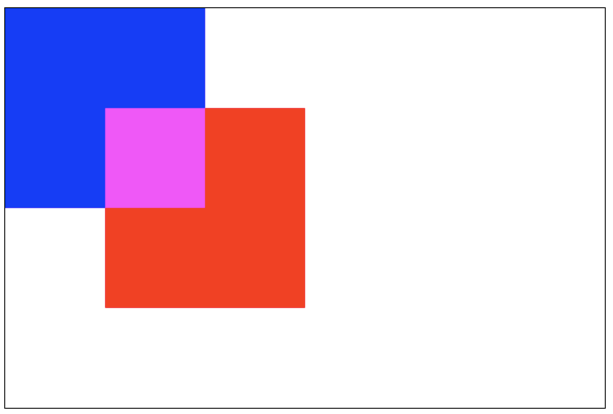
lighten:保证重叠部分最量的像素。(每个颜色位进行比较,得到最大的)blue: #0000ff
red: #ff0000
所以重叠部分的颜色:
#ff00ff
xor:重叠部分会变成透明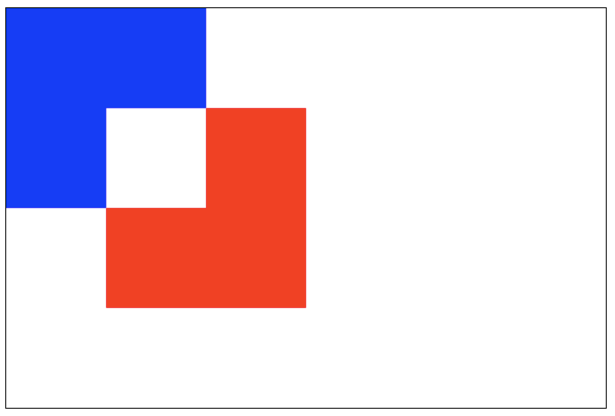
copy:只有新图像会被保留,其余的全部被清除(变透明)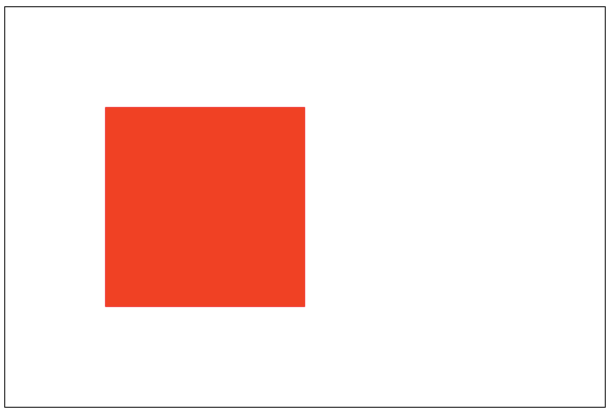
说明:
ctx.clip()只显示裁剪路径内的区域,裁剪路径外的区域会被隐藏。clip()只能遮罩在这个方法调用之后绘制的图像,如果是clip()方法调用之前绘制的图像,则无法实现遮罩。也就是说clip()先调用,后面绘制在裁剪区域内的图像才会被裁剪掉,只显示闭合路径区域内的图像。
function clipPath() {
  ctx.beginPath();
  ctx.arc(100, 100, 50, 0, Math.PI * 2);
  ctx.closePath();
  ctx.clip(); // 设置之前的闭合路径变为裁剪路径
  ctx.fillStyle = "red";
  ctx.fillRect(50, 50, 100, 100); // 填充红色矩形,结果中只显示圆形裁剪路径中的图像部分
  ctx.lineWidth = 5;
  ctx.strokeStyle = "black";
  ctx.stroke();
}
clipPath();说明:
绘制动画的主要步骤:清除画布 => 绘制图形 => 更新状态 => 清除画布 => 绘制图形 => ...
// 绘制网格
function strokeGrid() {
  ctx.strokeStyle = "rgba(0,0,0,0.3)";
  ctx.save();
  // 绘制垂直线
  for (let i = 0; i < WIDTH; i += 50) {
    ctx.beginPath();
    ctx.moveTo(i, 0);
    ctx.lineTo(i, HEIGHT);
    ctx.closePath();
    ctx.stroke();
  }
  // 绘制水平线
  for (let i = 0; i < HEIGHT; i += 50) {
    ctx.beginPath();
    ctx.moveTo(0, i);
    ctx.lineTo(WIDTH, i);
    ctx.closePath();
    ctx.stroke();
  }
  ctx.restore();
}

class Ball {
  public x: number;
  public y: number;
  public dx: number;
  public dy: number;
  public radius: number;
  public color: string;
  constructor(
    x: number,
    y: number,
    radius: number,
    dx: number,
    dy: number,
    color: string
  ) {
    this.x = x;
    this.y = y;
    this.dx = dx;
    this.dy = dy;
    this.radius = radius;
    this.color = color;
  }

  draw() {
    ctx.save();
    ctx.beginPath();
    ctx.arc(this.x, this.y, this.radius, 0, Math.PI * 2);
    ctx.closePath();
    ctx.fillStyle = this.color;
    ctx.fill();
    ctx.restore();
  }

  update(color?: string) {
    // 碰撞检测
    if (this.x - this.radius <= 0 || this.x + this.radius >= WIDTH) {
      this.dx = -this.dx;
    }
    if (this.y - this.radius <= 0 || this.y + this.radius >= HEIGHT) {
      this.dy = -this.dy;
    }
    this.x += this.dx;
    this.y += this.dy;
    this.color = color ?? this.color;
  }
}

// 存放小球实例
let balls: Ball[] = [];
// 首次生成多少个小球
let count = 100;

for (let i = 0; i < count; i++) {
  // 先创建100个小球
  let ball = new Ball(
    Math.floor(Math.random() * (WIDTH - 100)) + 50,
    Math.floor(Math.random() * (HEIGHT - 100)) + 50,
    Math.random() * 25,
    Math.floor(Math.random() * 20) - 10,
    Math.floor(Math.random() * 20) - 10,
    `rgba(
    ${Math.random() * 255},
    ${Math.random() * 255},
    ${Math.random() * 255},
    ${Math.random()})`
  );
  balls.push(ball);
}

// 绘制动画的关键步骤:清除画布、绘制图形、更新状态,循环往复
function animate() {
  // 清除画布
  ctx.clearRect(0, 0, WIDTH, HEIGHT);
  // 绘制网格
  strokeGrid();
  for (let i = 0; i < balls.length; i++) {
    let ball = balls[i];
    // 绘制小球
    ball.draw();
    // 更新状态
    ball.update();
  }
  requestAnimationFrame(animate);
}
animate();

// 监听点击事件:在鼠标点击的地方添加一个小球
window.addEventListener("click", (event: MouseEvent) => {
  const { clientX, clientY } = event;
  let ball = new Ball(
    clientX,
    clientY,
    25,
    Math.ceil(Math.random() * 10) - 5,
    Math.ceil(Math.random() * 10) - 5,
    `rgba(
    ${Math.random() * 255},
    ${Math.random() * 255},
    ${Math.random() * 255},
    ${Math.random()})`
  );
  balls.push(ball);
});

// 监听窗口缩放事件
window.addEventListener("resize", (event) => {
  let timer = null;
  // 防抖,避免短时间内响应用户频繁放大缩小事件
  if (timer) {
    timer = null;
  }
  timer = setTimeout(() => {
    WIDTH = document.documentElement.clientWidth;
    HEIGHT = document.documentElement.clientHeight;
    canvas.width = WIDTH;
    canvas.height = HEIGHT;
    strokeGrid();
    for (let i = 0; i < balls.length; i++) {
      let ball = balls[i];
      ball.x = Math.floor(Math.random() * WIDTH);
      ball.y = Math.floor(Math.random() * HEIGHT);
    }
  }, 500);
});enum fontColor {
rainbow = "rainbow",
green = "green",
}
/**黑客帝国雨 */
class Matrix {
canvas: HTMLCanvasElement;
ctx: CanvasRenderingContext2D;
fontSize: number;
fontFamily: string;
charColor: string;
text: string;
cols: number;
drops: number[];
timer: number | null;
constructor(
canvas: HTMLCanvasElement,
text: string,
charColor: fontColor = fontColor.green,
fontSize: number = 18,
fontFamily: string = "Arial"
) {
this.canvas = canvas;
this.ctx = canvas.getContext("2d") as CanvasRenderingContext2D;
this.text = text;
this.fontSize = fontSize;
this.charColor = charColor;
this.fontFamily = fontFamily;
this.drops = [];
this.timer = null;
this.cols = Math.floor(canvas.width / this.fontSize);
this.init();
}
init() {
if (this.timer) {
clearInterval(this.timer);
this.timer = null;
}
this.ctx.font = `700 ${this.fontSize}px ${this.fontFamily}`;
for (let col = 0; col < this.cols; col++) {
// 初始化位置
this.drops[col] = 0;
}
this.draw();
this.timer = setInterval(() => this.draw(), 1000 / 30);
}
draw() {
// 让背景色逐渐由透明到不透明
this.ctx.fillStyle = "rgba(0, 0, 0, .05)";
// 清空画布
this.ctx.fillRect(0, 0, this.canvas.width, this.canvas.height);
// 给字体设置样式
this.ctx.font = `${this.fontSize}px ${this.fontFamily}`;
// 给字体添加颜色
this.ctx.fillStyle =
this.charColor === fontColor.rainbow
? `${this.randColor()}`
: fontColor.green;
// 绘制文字
for (let i = 0; i < this.cols; i++) {
let index = Math.floor(Math.random() * this.text.length);
let x = i * this.fontSize;
let y = this.drops[i] * this.fontSize;
this.ctx.fillText(this.text[index], x, y);
// 如果要改变时间,肯定就是改变每次的起点
if (y >= this.canvas.height && Math.random() > 0.98) {
this.drops[i] = 0;
}
this.drops[i]++;
}
}
randColor() {
let r = Math.floor(Math.random() * 256);
let g = Math.floor(Math.random() * 256);
let b = Math.floor(Math.random() * 256);
return `rgb(${r},${g},${b})`;
}
resize() {
this.canvas.width = document.documentElement.clientWidth;
this.canvas.height = document.documentElement.clientHeight;
this.init();
}
}
const matrix = new Matrix(canvas, "01");
// 监听窗口大小变化
window.addEventListener("resize", () => {
let timer: number | null = null;
if (timer) {
clearTimeout(timer);
timer = null;
}
timer = setTimeout(() => matrix.resize(), 300);
});